Picture this: your guitar isn’t just a musical instrument—it’s a canvas waiting to showcase your unique style. Whether you’re a seasoned musician or a weekend strummer, transforming your guitar with a fresh coat of paint can elevate its look and make it truly yours.
From choosing the right paint to mastering the techniques, the journey of painting a guitar is both fun and rewarding. It’s not just about colors and brushes; it’s about infusing personality into every string and curve. Ready to create a masterpiece that’ll turn heads on and off the stage? Let’s dive in and make your guitar a work of art.
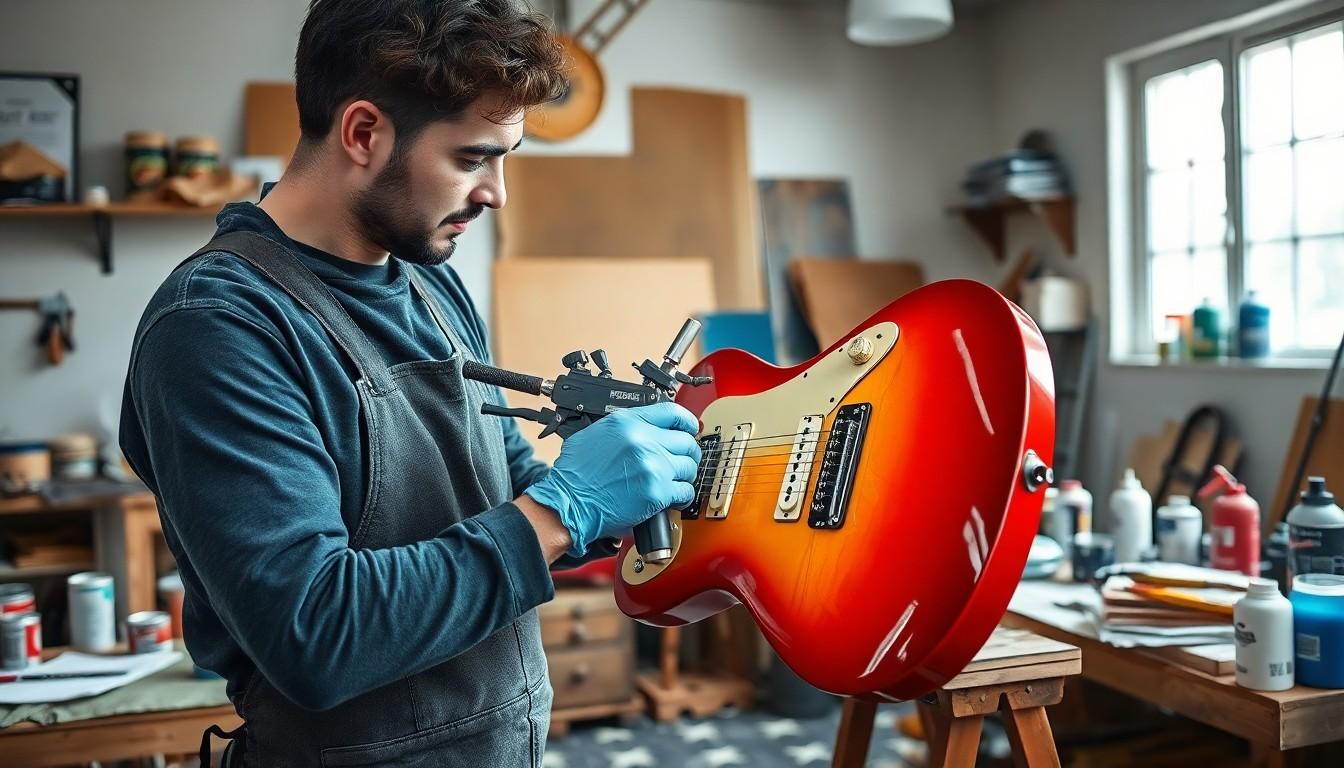
How to Paint a Guitar
Selecting the right materials and tools ensures a smooth guitar painting process. Proper preparation and quality supplies contribute to a professional finish.
Paint Types
Choosing the appropriate paint type is crucial for durability and appearance. Acrylic paints offer vibrant colors and easy application, making them ideal for beginners. Enamel paints provide a glossy finish and withstand wear, suitable for intricate designs. Spray paints enable even coverage and reduce brush marks, enhancing the overall look. Additionally, specialty guitar paints, such as nitrocellulose, offer classic finishes favored by many musicians. Each paint type varies in drying time and ease of use; therefore, selecting based on project requirements ensures the best results. It’s essential to consider factors like flexibility and adhesion to prevent cracking or peeling over time. Testing paint samples on a small area can help determine compatibility with the guitar’s surface, ensuring a long-lasting and professional appearance.
Essential Tools
Having the right tools streamlines the guitar painting process. Sandpaper with varying grits prepares the surface by smoothing imperfections and ensuring paint adhesion. High-quality brushes in different sizes allow precise application of paint and detail work. Painter’s tape masks areas that should remain unpainted, maintaining clean lines and protecting hardware. A spray gun provides an even coat, especially for larger surfaces, while ventilation masks ensure safety by preventing inhalation of fumes. Drop cloths or protective coverings safeguard the workspace from spills and splatters. Mixing cups and stir sticks facilitate proper paint consistency, while a respirator mask offers additional protection during application. Additionally, clamps hold parts in place during drying, ensuring alignment and preventing unwanted movement. These essential tools contribute to a efficient workflow and a flawless painted guitar.
Preparing the Guitar
Proper preparation ensures a smooth painting process and a professional finish. It involves removing hardware and thoroughly sanding and cleaning the guitar.
Removing Hardware
Detaching hardware prevents paint application issues and protects metal components. Start by carefully removing strings using a string winder. Unscrew the bridge, tuning pegs, and pickups with appropriate screwdrivers. Label each part to facilitate reassembly. Store hardware safely in containers to avoid loss or damage. Remove additional attachments, such as straps and knobs. Disconnect electronic components if necessary. Confirm all hardware pieces are accounted for before proceeding to painting.
Sanding and Cleaning
Sanding creates a smooth surface for paint adhesion and removes existing finishes. Begin with coarse-grit sandpaper, such as 220, to eliminate imperfections. Progress to finer grits, like 400, for a polished finish. Sand evenly across the guitar body, neck, and headstock. After sanding, wipe the surface with a tack cloth to remove dust particles. Cleaning eliminates grease and contaminants that hinder paint bonding. Use isopropyl alcohol or a mild detergent solution to thoroughly clean all surfaces. Allow the guitar to dry completely before applying any primer or paint.
Painting Process
The painting process transforms the guitar’s surface, ensuring durability and visual appeal. Each step plays a crucial role in achieving a professional finish.
Applying Primer
Applying primer ensures paint adheres properly and highlights the guitar’s shape. Choose a high-quality primer compatible with the selected paint type. Spray primers offer even coverage, reducing brush marks. Apply a thin, uniform coat, maintaining a distance of 12 inches from the surface. Allow 24 hours for the primer to dry completely, preventing imperfections. Sand lightly with 400-grit sandpaper to smooth the surface before adding paint layers. Repeat the priming process if necessary to achieve full coverage. Proper priming minimizes paint absorption, enhancing color vibrancy and longevity. Using the correct primer type tailored to the guitar’s material optimizes adhesion and overall finish quality.
Painting Layers
Painting layers add depth and color to the guitar’s surface. Select acrylic or enamel paints for their durability and vibrant hues. Spray painting ensures an even application, minimizing brush strokes. Apply two to three thin coats, allowing each layer to dry for 2-3 hours. Maintain consistent spraying motion to avoid drips and uneven coverage. Sand lightly with 600-grit sandpaper between layers to eliminate imperfections and promote adhesion. Multiple layers build color intensity and create a smooth finish. Choosing high-quality paint reduces the number of required coats, saving time and resources. Proper technique during painting layers enhances the guitar’s aesthetic and durability.
Clear Coat Finish
A clear coat finish protects the painted surface and adds shine. Opt for gloss, satin, or matte clear coats based on desired appearance. Spray application ensures a smooth, even layer, preventing brush marks and runs. Apply two coats, allowing each to dry for 24 hours before sanding with 800-grit sandpaper. This process enhances surface smoothness and durability. Clear coats guard against scratches, UV damage, and wear, extending the guitar’s lifespan. Selecting a high-quality clear coat ensures resistance to environmental factors and maintains the paint’s vibrancy. Proper application of the clear coat finish completes the professional look and protection of the painted guitar.
Drying and Curing
Proper drying and curing ensure the painted guitar achieves a durable, high-quality finish. Optimal drying conditions include a temperature between 65°F and 75°F with 50% humidity. Typical drying times depend on the paint type:
-
- Acrylic Paints: Dry in approximately 24 hours.
-
- Enamel Paints: Require up to 48 hours to dry.
-
- Spray Paints: Dry within 1 to 2 hours.
| Paint Type | Drying Time | Curing Time |
|---|---|---|
| Acrylic | 24 hours | 7 days |
| Enamel | 48 hours | 14 days |
| Spray Paint | 1-2 hours | 3-7 days |
During the curing phase, maintain a stable environment to enhance paint adhesion and durability. Avoid handling the guitar prematurely, as exposure to dust or moisture can compromise the finish. Ensure ventilation to facilitate the curing process, especially when using spray paints. Regularly monitor the guitar for any signs of imperfections that may require touch-ups. Adhering to these guidelines guarantees a professional, long-lasting paint job.
Tips for Success
-
- Surface Preparation: Clean and sand the guitar thoroughly to ensure paint adheres properly.
-
- Quality Materials: Use high-grade acrylic or enamel paints for durability and vibrant colors.
-
- Multiple Thin Coats: Apply several light layers instead of one thick coat to prevent drips and uneven coverage.
-
- Proper Drying: Allow each coat to dry completely, following the recommended times for each paint type.
-
- Sanding Between Layers: Lightly sand between coats to remove imperfections and create a smooth surface.
-
- Protective Environment: Maintain a stable temperature between 65°F and 75°F with 50% humidity to optimize drying conditions.
-
- Use Appropriate Tools: Utilize fine-grit sandpaper, quality brushes, and spray guns for the best application results.
-
- Safety Measures: Wear protective gear, including gloves and masks, to ensure safety during the painting process.
-
- Workspace Protection: Cover surrounding areas with drop cloths or masking tape to prevent accidental paint marks.
-
- Monitor Each Layer: Inspect each coat for flaws, allowing timely touch-ups to ensure a flawless finish.
Transforming a guitar through painting unlocks endless creative possibilities. This journey not only personalizes the instrument but also enhances its aesthetic appeal. By carefully selecting materials and mastering techniques, anyone can achieve a professional finish that truly stands out. Embracing the process from preparation to the final touches ensures a durable and vibrant result. Whether you’re a seasoned musician or a passionate hobbyist painting your first guitar, the effort invested brings a unique sense of accomplishment. Let creativity guide each step and enjoy the satisfaction of playing a guitar that reflects your individual style and artistry.